Amazing Lace
/Welcome back! I have some new stuff to show you this week. First of all, I'm sure you have already noticed the new theme. I decided I liked the colors and layout better. Secondly, I now have my own domain (thanks, Jason!). You can access my blog the way you have been, or also by going to crystal-crafts.net and my shop can be found at shop.crystal-crafts.net. Now on to the fun stuff. I always love learning new knit and crochet techniques and lately it has been all about the lace. It has always looked so complicated to me that I have been afraid to try, but I gave it a shot. I just finished my first lace scarf and it was easier that I thought it would be. Now I want to try more lace projects!
I started off trying to make the One Row Lace Scarf (http://turvid.blogspot.com/2009/03/free-pattern-one-row-lace-scarf.html):

While I really love this pattern, I decided that I wanted to go in another direction. I was using my hand-spun cashmere yarn after all and wanted something a little nicer looking. So, back to the ravelry pattern finder I went and came up with the Leafy Lace Scarf pattern (http://knitlet.typepad.com/knitlet/files/leaflacescarf.pdf).

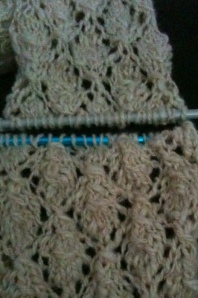
The interesting thin about this pattern is that you knit each half of the scarf separately, then use the kitchner stitch to sew them together. The kitchner stitch uses a regular yarn needle to sew stitches together in a way that looks like it is knit. To do this, I first had to line up both halves of the scarf. At this point all the stitches are still on the knitting needles:

Then I got out the yarn needle and started sewing the two halves together:
Once it's done it's hard to even tell where the seam is:
One of the most important steps in the lace knitting process is blocking. Blocking involves soaking the scarf in cold water then pining it out so that the lace pattern can open up. It stays pinned until it is completely dry. I got 2 towels out on the ground and covered then with a black sheet (for pictures). Then I started pinning...


I left it out for a few days to make sure it was completely dry, then took all the pins back out. Below you can see the before and after pictures from blocking.
And it's done! As you can see, blocking really does make an amazing difference!


