"Howling at the Moon"... and more!
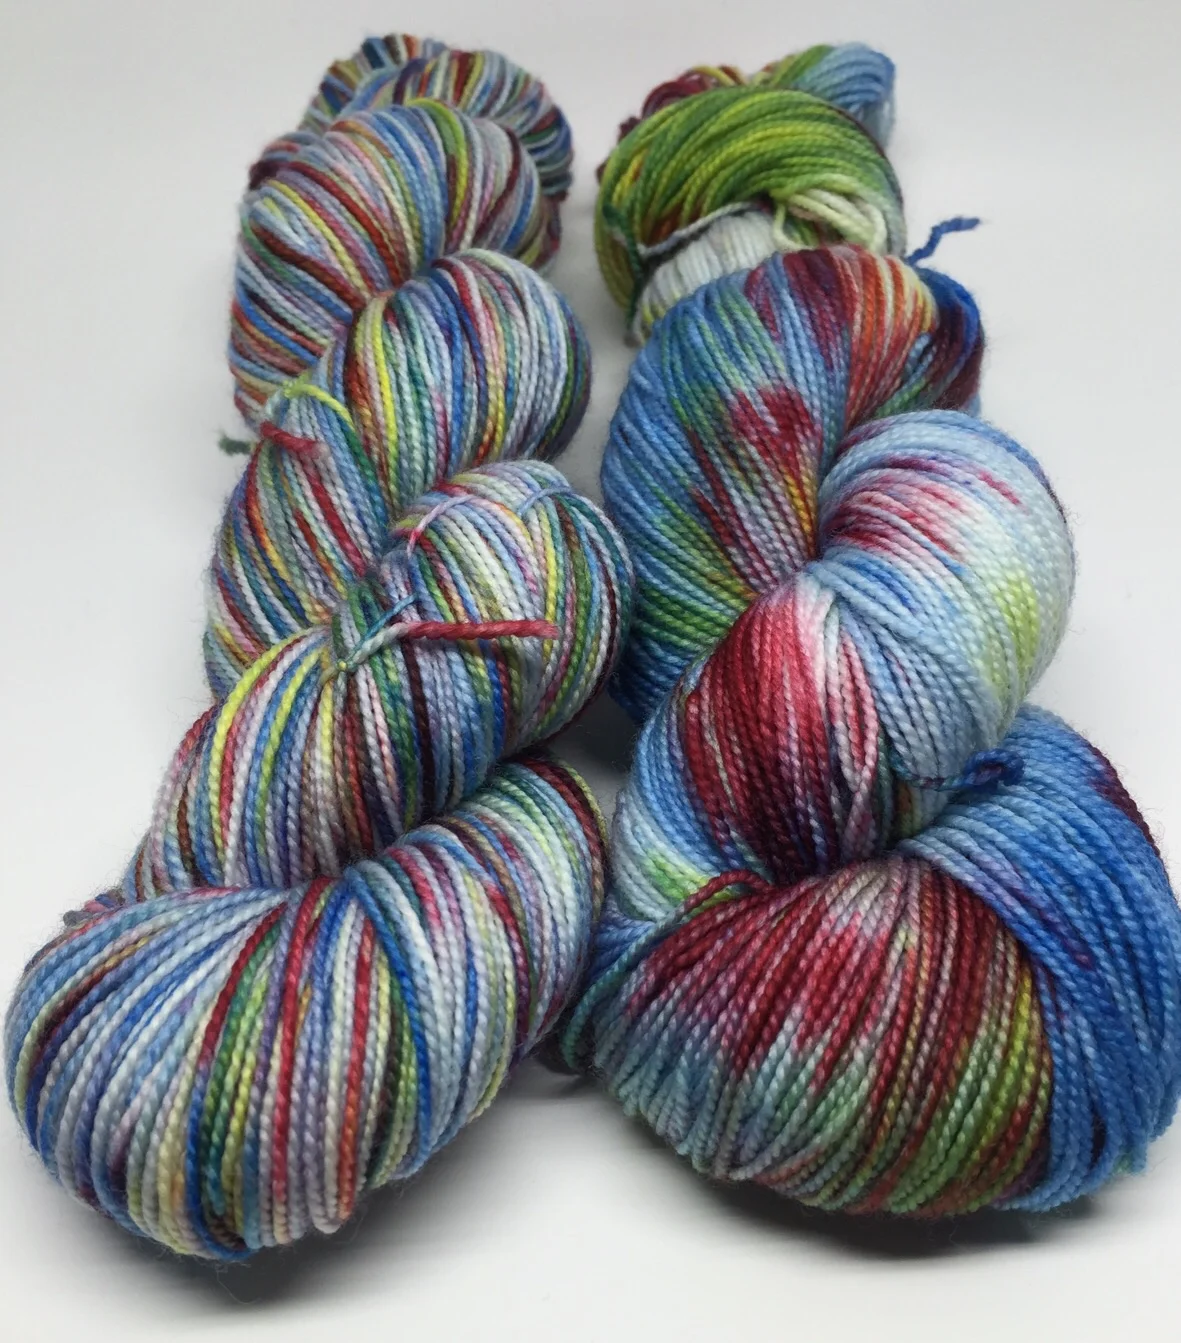
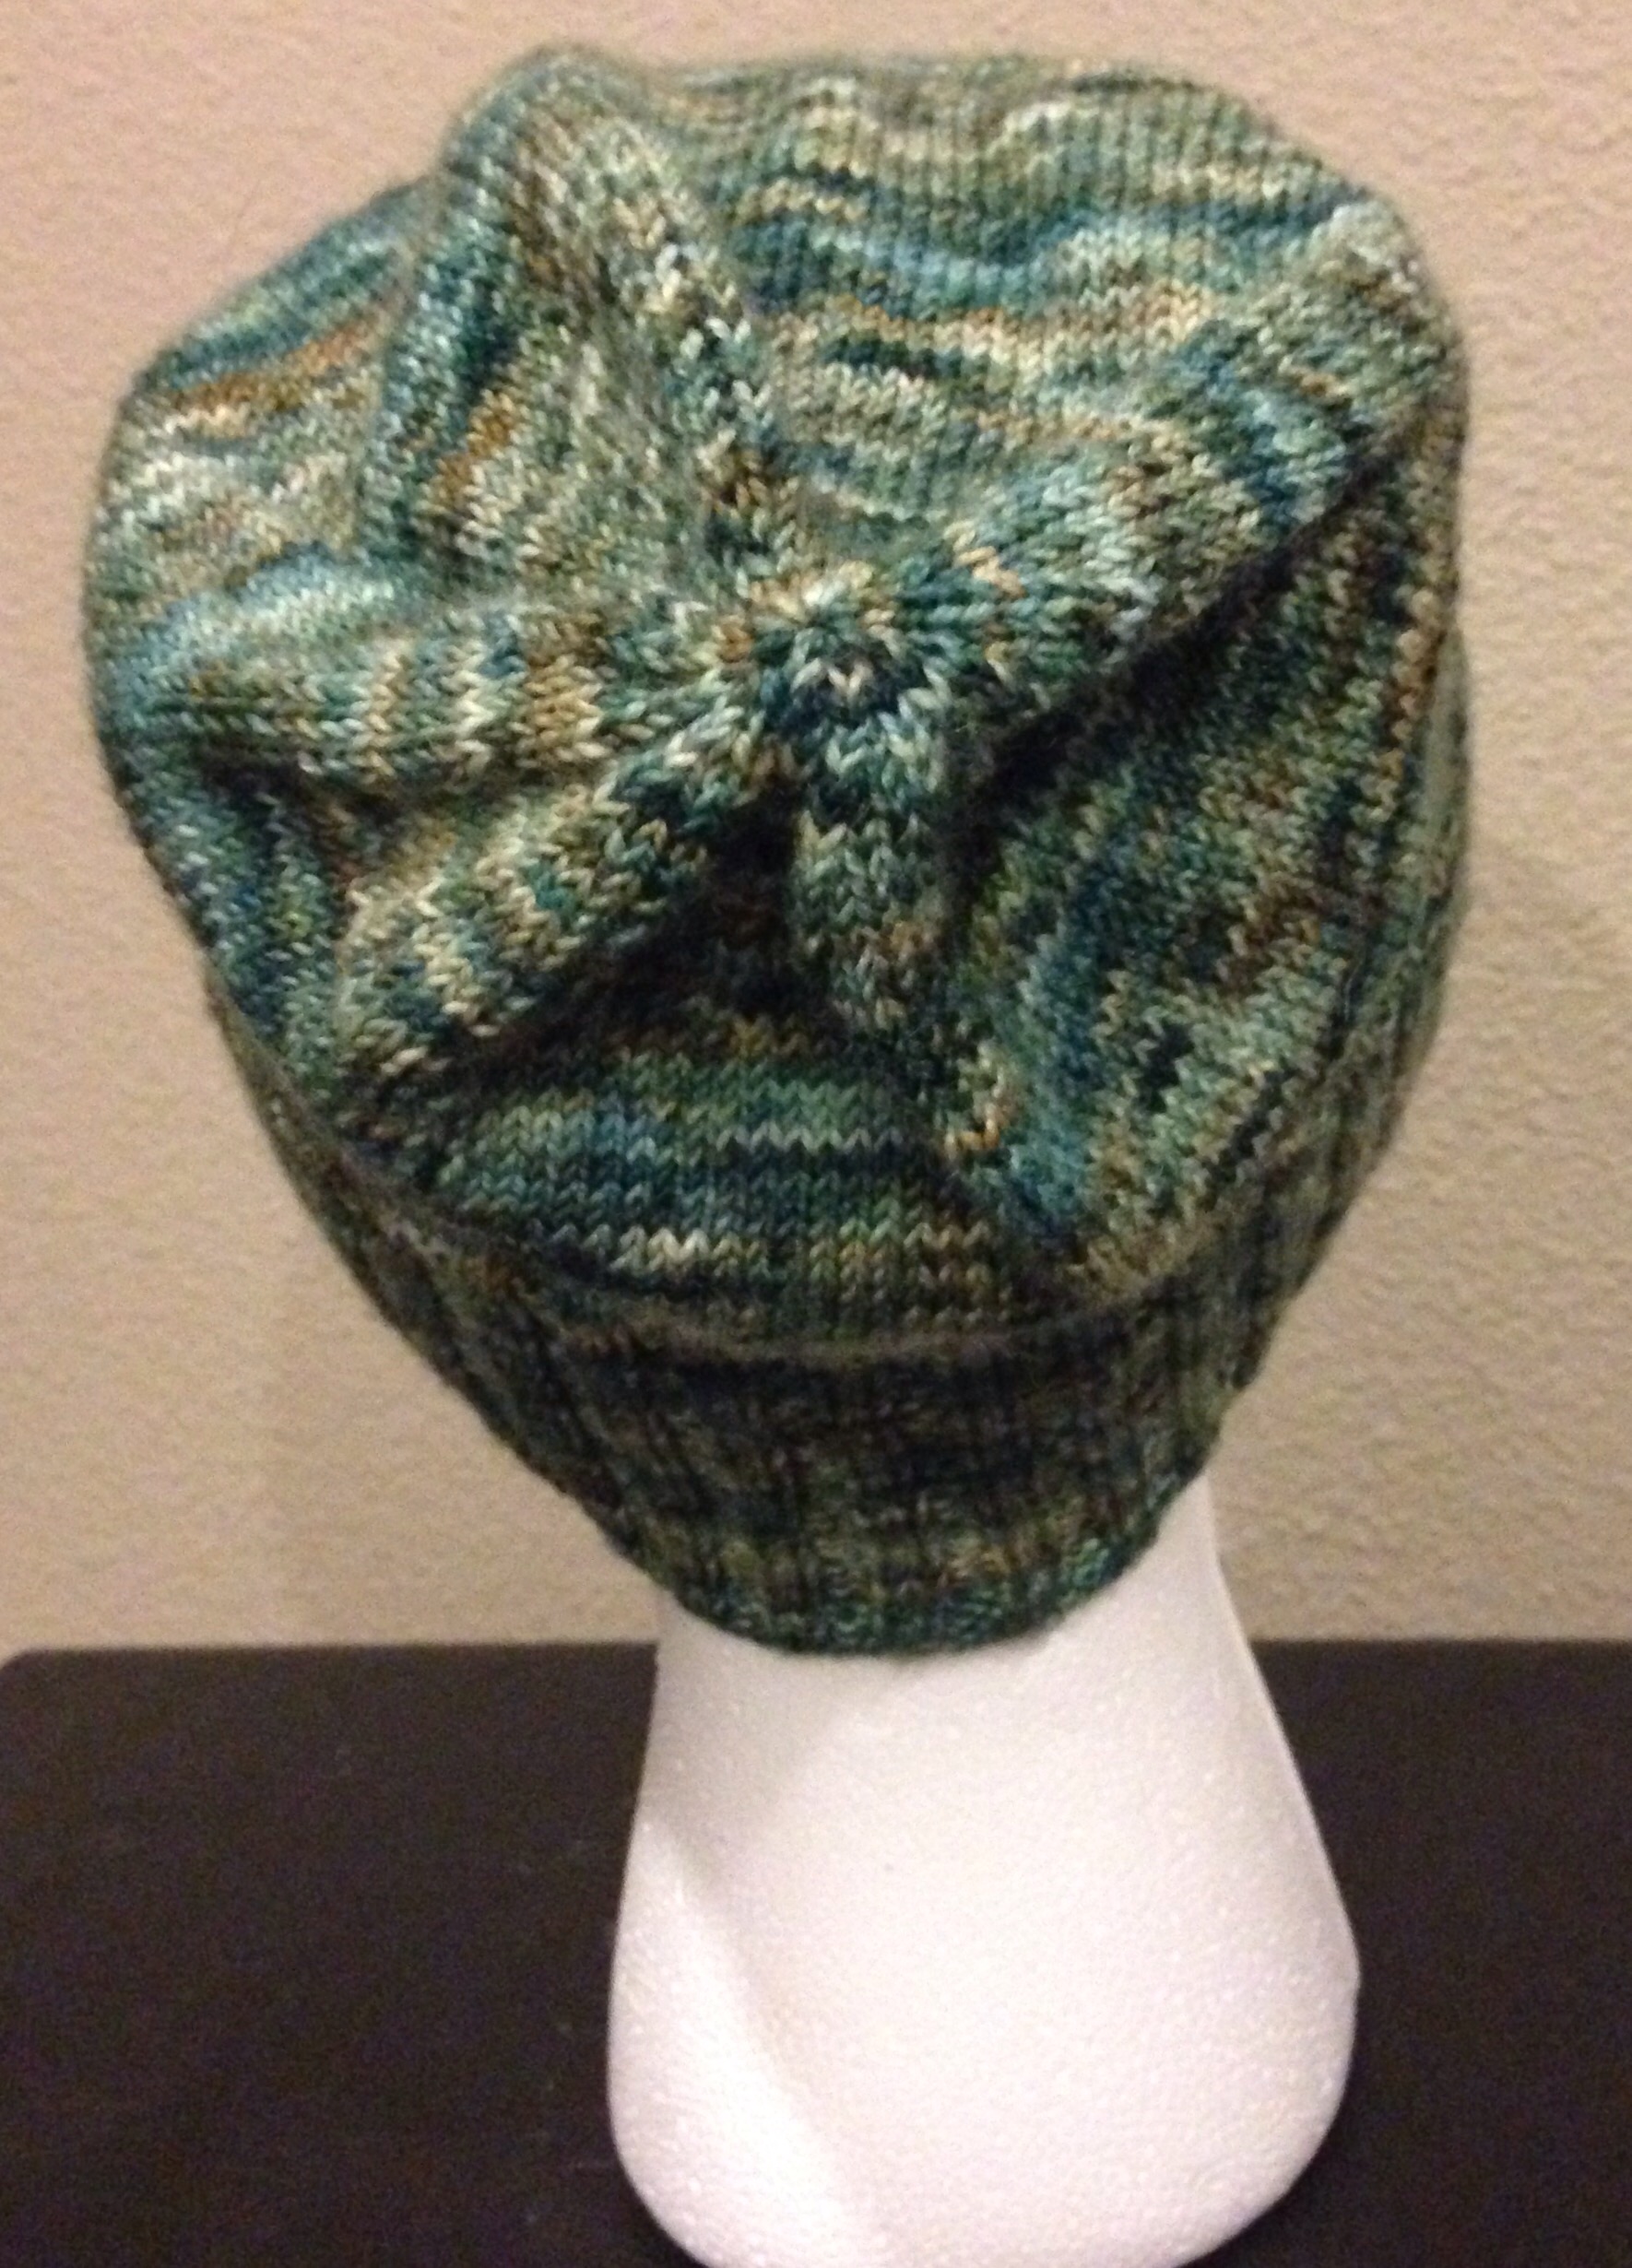
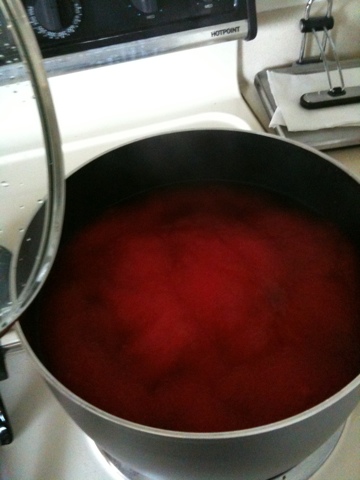
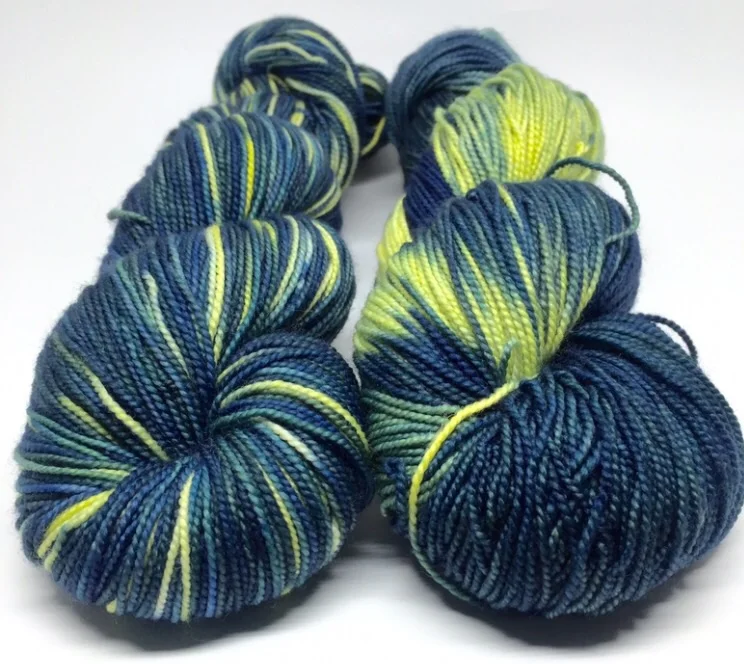
Three new colorways have made their way into the shop! The first is called "Howling at the Moon" and is inspired by the moon in the night sky. It's dark blue-green with bits of yellow. 

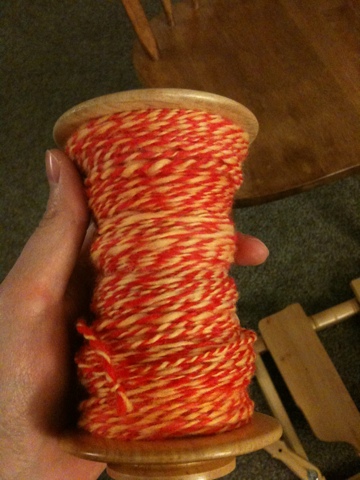
You'll also notice that I have 2 skeins in each picture- these are from the same dye lot. The one on the right is straight from the dye pot. The one on the left is re-skeined. To do this I take the skein on the right and re-wind the yarn into a slightly bigger loop which re-distributes all the colors. I usually do this for 2 reasons: 1) The colors turn out much more like how they will look when the yarn is knit up and 2) it makes the skein look neater. I have always re-skeined my yarn but wanted to show how it looks both ways. If you like one more than the other feel free to leave me a comment! 

image.jpg

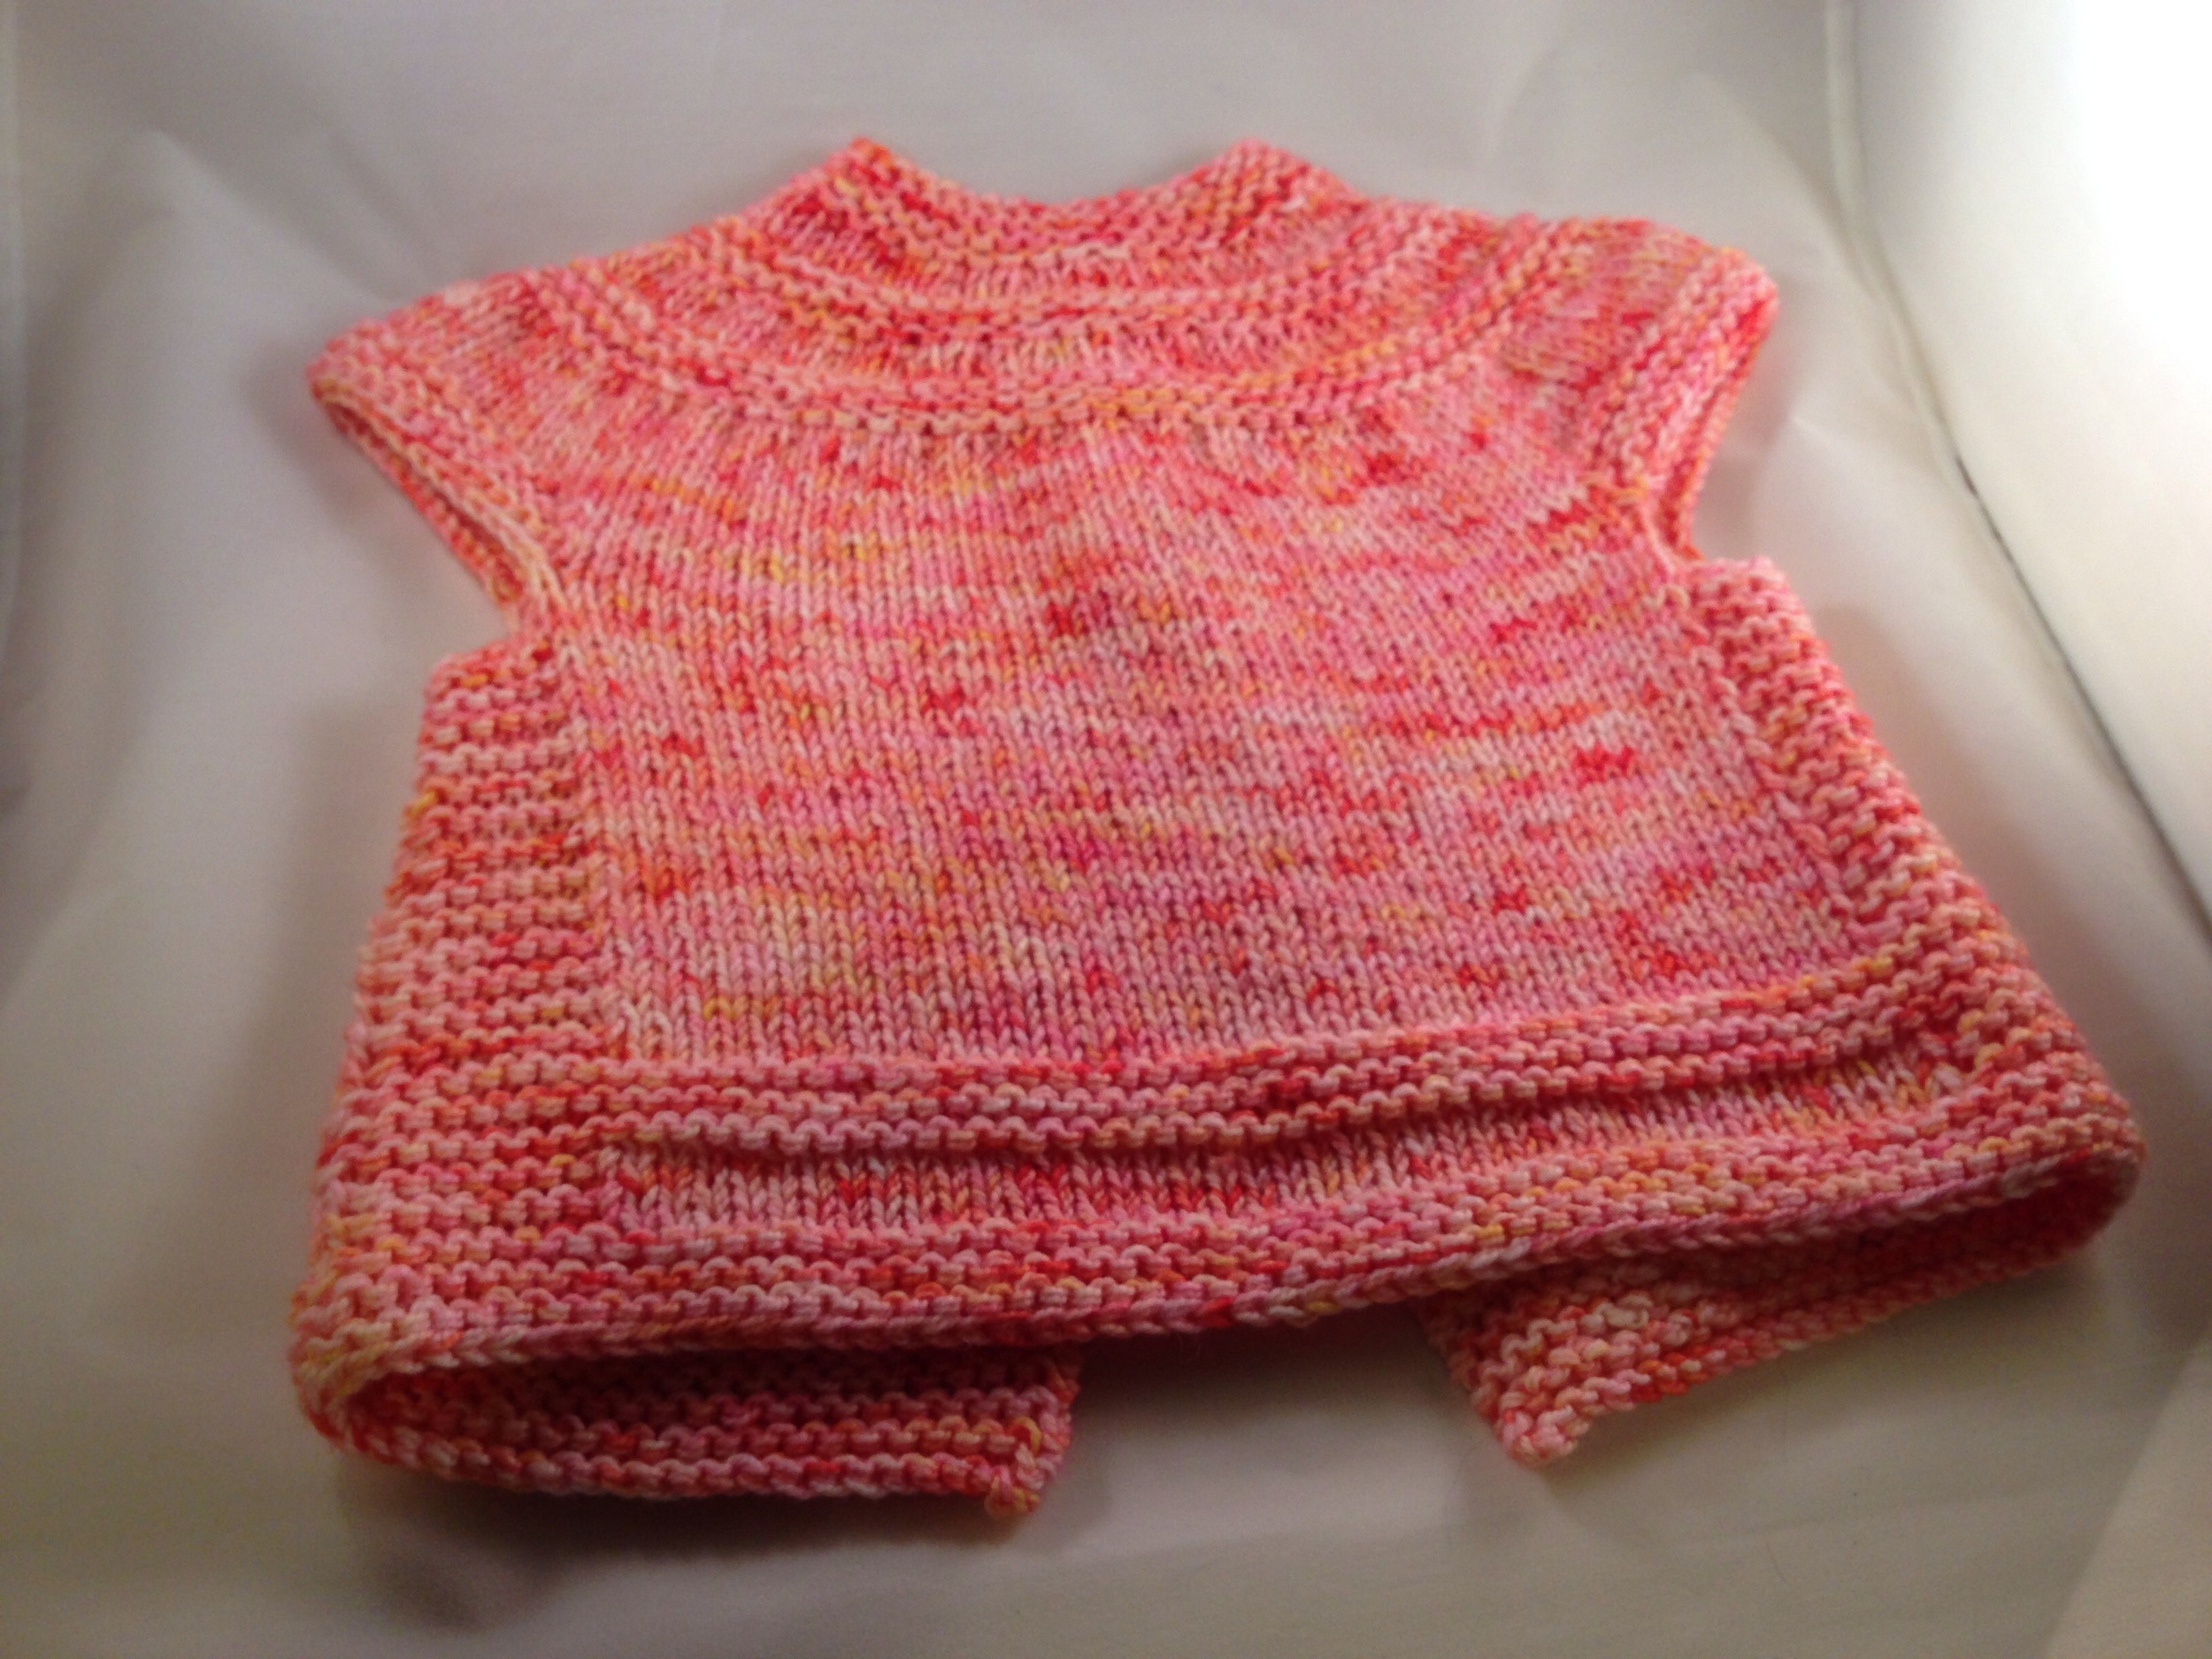
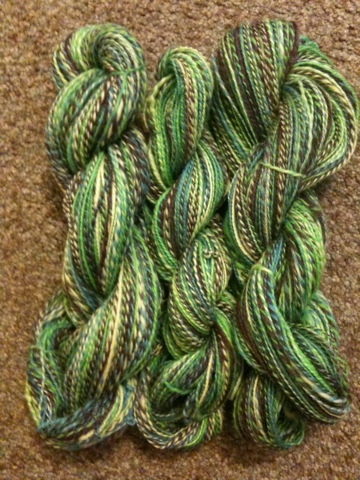
This next one was a little harder to name. Sometimes I start with a name and pick colors to match (which I did with the other two colorways in this post) and sometimes I just throw in some colors and name it later. These are usually harder for me to name, but for this one I came up with "Catching Butterflies." These colors make me think of butterflies. Rudy loves to chase butterflies (and all bugs for that matter) so the name seemed fitting. 

image.jpg

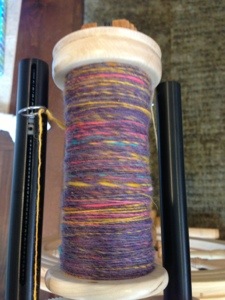
This last one is one that I've had in mind for a long time. I call it "Chasing Cars." When Lilliput was a puppy she wanted to chase every car she could. Every time we went on a walk she wanted to chase all of the cars. Luckily she seems to have grown out of this obsession, but I still thought it would be a fun colorway. There are lots of colors to represent cars driving down the road as Lily tries to chase them. 

image.jpg

Aftermath

I had such a good time at yarn crawl this year! Thanks so much to Tina (owner of Black Sheep at Orenco) for allowing me to set up a trunk show at her shop! I had a blast, sold my yarn and met lots of new knitters.  

image.jpg

After the Thursday / Friday trunk show, my mother-in-law, husband and I hit the other 14 shops that were part of this years Rose City Yarn Crawl. I wasn't planning on buying much (because let's face it- I have enough yarn to knit with for quite a while) but still got some goodies:

image.jpg

Overall it was a great weekend and I'm already looking forward to Yarn Crawl 2016. :)

Almost Yarn Crawl Time!

It's March, and that can only mean that it's almost time for the Rose City Yarn Crawl here in Portland! This is the 3rd year that I will have lived in Portland for the yarn crawl and I look forward to it every year. I had a good time at my first crawl in 2013 and had a fun time last year, too. 

This year the crawl is extra special for 2 reasons: 

1) My mother-in-law is coming down from Alaska and will be doing the crawl with me! (And probably my poor husband who will end up being dragged along. He's generally ok with this as long as we stop at some good places for food.). She is a knitter too and every year I mention that she should come. This year she is and I can't wait! 

2) I will be having a trunk show at Black Sheep! I am so excited and a little nervous. I have never done anything like this before. I will be selling my Lilliput Yarn on Thursday and Friday (March 5th and 6th) from 10-6. If you're local I'd love if you come by and say "Hi"! 

I've been working on knitting up some of my yarn so that I have samples to show at my table. The first thing is the super popular Sockhead Hat by Kelly McClure knit in the "Barking up a Tree" colorway. 


image.jpg

I really like how it turned out, but there was what seemed to be some never-ending stockinette stitch involved. 

image.jpg

I also made a sock in my "Lady" colorway. No pattern used, just a toe-up sock with a short row heel. I try to make all of my yarn in a way that it won't pool and it turned out well in this case. It really drives me crazy when I get pooling in socks so I do all that I can to avoid that from happening in my own yarns. 

image.jpg

Lastly, I finished up the Rose City mystery shawl aka the Washington Park Shawl by Debbi Stone. This was my first year doing the mystery shawl that they release as part of the yarn crawl and I really enjoyed it. 

image.jpg

The light color is Cascade Heritage Sock in the "Limestone" colorway and the blue is Lilliput Yarn in the "Salty Dog" colorway. I almost did the shawl out of two colors of my own yarn but thought that might be too busy and went with a neutral instead. 

image.jpg

Now that those projects are done I have spent most of the weekend re-skeining and labeling yarn in anticipation of the yarn crawl. It's been a lot of work, and I think I may have tired out my little helpers. 

image.jpg

More Treats

A few posts ago I wrote about my self-striping yarn called "Trick or Treats." I've been knitting up some socks to see how the color stripes turn out. I really like the final result: 

Sample sock

Sample sock

This is my own pattern. I started on the toe using Judy's magic cast on and increased until I had 64 stitches (this is the typical number of stitches that I cast on with size 1 needles to fit my foot). I kept knitting until I got the the heel. I decided to use an afterthought heel at this point so that the striping sequence wouldn't be disrupted. 

When I got to the middle of the orange stripe I knit in a piece of scrap yarn on half of the stitches (32 in this case) and then just continued knitting as usual. Once I cast off the top of the sock I went back to finish up the heel. 

I went back to the scrap yarn that I had knit in and took it out while picking up stitches as I went. Then I figured out where the halfway point was in one of the orange strands of yarn and started knitting in much the same way that I would make a toe in a cuff-down sock. I decreased down to 32 stitches then used the kitchener stitch to close the end. 

Picking up stitches to start the heel. 

Picking up stitches to start the heel. 

Once I finished this sock I weighed the remaining yarn and determined that if I used a different ball of yarn for the toe and heel then I could get a 2nd and 3rd sock out of the same ball of yarn. For this pair I used Emily O'Grady's Vanilla Bean Striped Sock recipe. 

Vanilla Bean Sock Recipe

Vanilla Bean Sock Recipe

I love how this one turned out and I'm about halfway through making the next one. I'm also dyeing up some more of this colorway as I type this to re-stock my shop. Keep an eye out for it soon! 

In threes... again

Welcome to my new blog and website! My husband and I have been working hard on getting this site up and running and I'm excited to be making the first blog post in the new location. 

This pattern has been one of my favorites lately. I have posted about this pattern before, but is is called in threes: a baby cardigan by Kelly Hendrich. I made one for a co-worker and another for my niece (I just went to link to the blog of my niece and discovered that I never actually published it. oops! It will be appearing at some point in the future.) 

For this sweater I used my Lilliput Yarn in the "Sasha" colorway. I held the yarn double since the pattern calls for a worsted weight yarn and my yarn is fingering weight. It worked out pretty well and I was able to make the 0-6 month size out of just one ball of yarn. 

image.jpg
image.jpg
image.jpg

This one happens to have been knit for another co-worker and was given to her at her baby shower. She seemed to like it and it ended up getting passed around the circle of guests so that everyone could check it out. 

I like how it turned out so much that I am actually knitting an identical one to use as a sample of how the yarn knits up. 

"Trick or Treats"

Lily and I have been busy working on Lilliput Yarn's first self-striping yarn called "Trick or Treats". It's out in plenty of time to knit up a nice pair of Halloween socks! First we got the warping board out and made a huge loop of yarn. This was then dyed in sections. This yarn is 6 stripes- purple, orange, purple, white, black, white. IMG_4869.JPG

Once it was all dyed up we re-skeined it and brought it over to Black Sheep at Orenco where it waits for a new owner. (There will also be some going up in my Etsy shop in the near future.)IMG_4886.JPG

I was on my own by the end of this process as Lily decided that taking a nap would be more fun than getting yarn re-skeined. It's a rough life for Lilliput!

IMG_4870-1.JPG

New Colors!

Since my last post some new colors have joined the Lilliput Yarn line. DSCN4483


"Barking up a Tree" (Name suggested by Lynne - thanks!)

DSCN4476


"Limber Tail" (This color makes me think of swimming in a lake which is where the colorway name comes from. Limber tail is a condition that dogs can get when swimming in cold water where they temporarily can't wag. It's sad when it happens but I like to think that at least the dog probably had a great time while swimming.)

DSCN4493


"Puppy Love"

DSCN4480


"Sasha" (Sasha is my parents dog that we got when I was in high school. Her name seemed to fit well with this colorway.)

DSCN4488


"Shadow"

Hand-Dyed Sock Yarn

Lately I have been having fun playing with my Jacquard acid dyes. I have been using a sock yarn base that is 80% merino and 20% nylon. Since I end up dyeing much more yarn than I can possibly knit up I decided to start up a new Etsy shop called Lilliput Yarn! My yarn is also now available at the yarn shop Black Sheep at Orenco in Hillsboro, OR. I have kept "recipies" of all of my colors so that I can repeat them in the future. Since the yarn is named after Lily, she appears on all of my yarn labels. Logo


I started off with 10 colors but plan on increasing this number in the future. The colors that I have so far are:

DSCN4469


Chocolate Lab

DSCN4448

Clifford

DSCN4458

Doggy Paddle

DSCN4464

Evening Stroll

DSCN4466

Goldendoodle

DSCN4446Y

Jumping in the Leaves

DSCN4456Y

Man's Best Friend

DSCN4471

Nymeria

DSCN4445Y

Raining Cats and Dogs

DSCN4453


Rolling in the Grass

Experimental Yarn

A few weeks ago I decided to dye some wool. I had my soon-to-be-born niece in mind here when I picked the colors. I broke the fiber into pieces to start off with. The majority was in one piece, then 3 much smaller pieces. I decided to go with purple for the main color then teal, pink and yellow for the mix-in colors. I knew that I wanted to try to use my drum carder to blend the colors. Other than that I was completely winging it here. 20130601-175251.jpg

The dye did not take evenly at all. In fact, there were so many white spots in the purple wool that I dyed it again. To even out the color I decided to try running each color through the drum carder a few times.

20130601-175215.jpg

Which worked pretty well.

20130601-175223.jpg

Then it was time to try mixing the colors together. I evenly divided all of the colors into 6 sections and made 6 bats by randomly picking a color and running it through the carder.

20130601-175235.jpg

Then I randomly chose a bat and started spinning. I was able to fit 3 bats onto 1 bobbin, 3 onto another and then plied them together onto the third bobbin.

20130601-175241.jpg

Didn't turn out exactly how I expected (although I really didn't have much of an expectation to begin with). I was going for a darker purple and lighter yellow, but too late now. I think it might be ok for a baby jacket or something. We'll see...

20130601-175156.jpg

Woolee Winder

My newest fiber toy is an attachment for my spinning wheel called a WooLee Winder. Most wheels come with a flyer like the one in the picture below with little hooks all around edge. To wind the yarn evenly on to the bobbin you need to move it down the hooks every few minutes. 20130602-212511.jpg

But, the WooLee winder is different. It's hard to see in this picture, but there is one loop that the yarn goes through. This loop moves back and forth along the length of the bobbin. This results in yarn that is very evenly distributed along the bobbin.

20130601-174952.jpg

This mechanism works because there is a gear on the flyer that aligns with the one on the bobbin.

20130601-174947.jpg

As the bobbin turns, the gear on the flyer turns which controls the movement of the loop up and down the bobbin.

20130601-174942.jpg

This means that you save time by not having to stop spinning every few minutes to move the yarn onto a new hook. Also, with such evenly distributed yarn (along with the slightly bigger bobbins) you can fit a whole lot more yarn on to one bobbin.

So far I really like it. I have spun up 2 skeins of yarn. It did take a little while for me to get used to the tension of the woolee winder. It seems to add quite a bit of tension to the yarn. Once I figured this out and turned the tension on the wheel itself almost all the way down I was good to go.

The first yarn was one that I dyed a while ago with kool-aid. It is Tesswater wool from my Paradise Fibers fiber club a while back. I divided the roving in half and dyed half with cherry and the other half with grape. (Must have forgotten to take a picture of the grape half. Oops.)

20130601-175100.jpg

Here they are spun into singles. There are 2 oz of fiber on each bobbin with plenty of room to spare.


20130601-175107.jpg

I then plied them together. The picture is a little washed out but you get the idea.

20130602-213030.jpg


After

My craft room is mostly set up and I love it! I got a desk from Ikea that fits in the corner. It's hard to see, but in the back corner of the desk I have my swift set up with the ball winder on the edge behind the chair. I am also able to keep my sewing machine out. It used to live on the top shelf of a closet which means I never used it. Maybe now that it's more accessible I will actually sew once in a while. 20130404-184047.jpg

Behind the desk is my bookshelf/yarn shelf. On top of this I have my drum carder, drop spindle and all of the knitting needles that I got from my grandma last time I visited.

20130404-184057.jpg

The closet has the majority of my yarn. The black container to the left of the closet holds all of my spinning fiber.

20130404-184124.jpg

It's great having so much room for all my crafting stuff. I could pretty much hang out in this room all the time. :)

My Little Helper

I am almost done with the little baby top that I showed you last time I posted - it just needs buttons. Yesterday I washed it and pinned it out to dry. 20130224-182244.jpg 20130224-182316.jpg

(The picture of the back side is more true to color than the first picture.)

Lily was very interested in the whole process and especially liked the smell of the wet wool. It made me laugh that, while I went to work on other things, she stayed by the sweater. She just liked to lay next to it like she was helping it to dry or something.

20130224-182259.jpg 20130224-182251.jpg

She kept getting up, walking around, then going back to the sweater. What a funny little dog!

While she was "helping" the sweater to dry, I was winding some skeins of yarn into balls. (She loves to watch the ball winder, too.)

I got them all wound, and here's a sneak peak at my next project:

20130224-182310.jpg

Life is Like a Box of Chocolates

Hello, I'm back again! I don't know how long this posting more than once a week business is going to hold up, but I really want to get through some of this backlog of projects. Also, I have made some progress on that yarn that I dyed last week that didn't quite turn out as expected. This next project goes along with the falling leaves hat. When I was done with the hat I had a ball of yarn left over and thought I should make something to go along with the hat. Someone from the knitting group at my local yarn store (Black Sheep) was making some fingerless mittens that I really liked. The lace pattern doesn't match the hat, but the yarn does and I think they look just fine together.

DSCN3848

They are surprisingly warm considering the amount of holes in them. The pattern is called "Mericash wrist warmers" by Jean Gray and is free on Ravelry. (By the way, I'm crystalcrafts on Ravelry if anyone out there wants to check out my project pages.)

DSCN3850 DSCN3852

On another note, remember that roving from last week? I spun it and plied it into this:

20130121-192337.jpg 20130121-192352.jpg

I was not such a fan of the colors. I decided to make up a dye pot of dark blue (Wiltons royal with a little black) and throw it in. After round 1 of dye it looked like this (sorry for the bad picture):

20130121-192404.jpg

I still wanted it darker so I added more dark blue and put the yarn back in. Here's what it looks like now:

20130121-192419.jpg 20130121-192433.jpg

It's weird, but I can't decide if I like it. I definitely like it more now then how it was. I just don't know. Although, after getting a great response from my knitting group yesterday I'm feeling a little better about it. You just never know what you're gonna get when dying yarn.

Dye Oops!

Sorry I haven't posted in so long again! I really will start trying to post on a more regular basis. I thought today would be a good day to dye some roving that I've had sitting around for a while. It is 4 oz of a wool/bamboo/nylon mix. (I have discovered that it takes about 4 oz of fiber to spin up enough yarn for a pair of socks.) For a while I have been trying to decide what colors I wanted to use. This morning I decided to try something new and go with orange, brown and green. This part always scares me because there is no turning back with dying. You can unravel knitting but there is no turning the roving back to white. (Although sometimes you can over dye and get a decent result which I will show you in a later post.)

I decided to go with the slow cooker method so I put the roving in with some water and vinegar to soak for a while.

IMG_2156

While that was soaking I mixed up some Wiltons icing coloring to use as my dye.

IMG_2155

After waiting a little while I added them to the pot. Green first,

IMG_2157

then orange,

IMG_2158

and brown last.

IMG_2159

Not my personal favorite colors but it was looking like it would be promising. Especially once it was spun and all the colors kind of blended together. So, I put the lid on and let it sit for a while.

When it was time to take the roving out I felt really silly. I had just thought that the dye would make it all the way through to all of the roving. It didn't. So, now I essentially have a white roving with scattered chunks of green, orange and brown.

IMG_2160

At this point I feel like I have 2 options:

1: Just let it dry and spin it up. Maybe once it is spun and plied it will look ok?

2: Lay it out so that the colors match up again and hand paint it. This would make it more like what I was originally going for, but I don't know if it's worth it.

What would you do?

Adventures with Kool Aid

Welcome back! First of all, the tank top that I mentioned in my first blog  finally dried and my head still fits through the head hole! It's pretty heavy and won't be as cool as I would like, but I'm glad I went ahead and finished it. 20110725-064427.jpg

Now to the main subject of the blog- Kool-Aid dying! I learned about this when I was at the fiber studio in Uniontown and had to try it out for my self. Kool-Aid dying works with any animal fiber (not with cotton or other non-animal fibers). It is so easy and fun. You just take a pot of water, get it boiling, add Kool-Aid (without sugar!) then add the yarn/roving.

20110725-064152.jpg

The yarn (or roving in this case, which will be spun into yarn) absorbs the Kool Aid and the water becomes completely clear. With this batch I used cherry flavored Kool Aid for half the roving and lemonaid for the other half. I spun each color separately and plied them together.

20110725-064232.jpg

Then, with different yarn I decided to attempt to make a teal color by mixing blue and green. Turned out more green than blue but it was an interesting experiment!

20110725-071459.jpg

For my next batch of roving I decided that I wanted to experiment with more colors, so I took 8oz of Corridale roving and divided it into 4 chunks. I dyed each piece a different color. I had purple, blue, yellow and green. I then took random  pieces of each color and spun them. Then, by plying them together I ended up with an interesting blend of colors.

20110725-071420.jpg

20110725-071431.jpg

What's next? Well, I decided to go for the reds this time. Turns out that cherry and strawberry make the same shade of red. So I took another 8oz of Corridale roving and split it into 4 pieces. Along with the cherry and strawberry there is also pink lemonaide and orange. The goal here is going to be to spin the red together in one single ply strand, then alternate pink and orange in the other strand.

20110725-071647.jpg

Once those are done I will ply them together and see how it turns out!