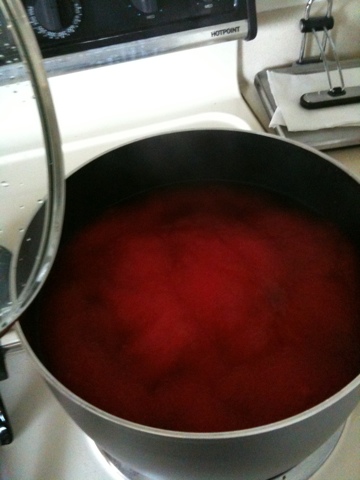
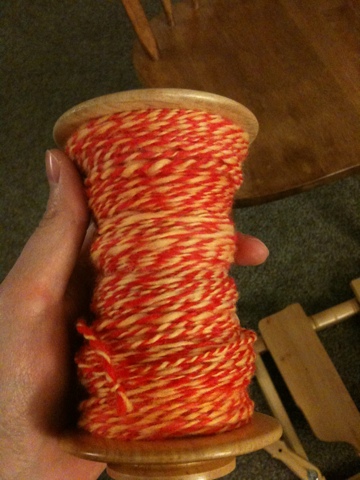
Weekend Projects

This weekend has been busy with crafting! On Saturday I got some roving ready to be made into sock yarn by mixing 3 oz of superwash wool with 1 oz of nylon with my new drum carder. I even got it dyed and it is now ready to be spun. (Pictures will come later once it it spun!) While I have a few different projects going on right now, I decided to cast on an entirely new project. I have been wanting my own wool hat and decided to make it with some yarn that I spun a while back. It was one of the first yarns I ever spun and was a bulky weight.

So, Saturday afternoon I grabbed some size 9 needles and did a super fast swatch to figure out that I was getting about 4 stitches to the inch. I then decided to cast on 88 stitches. (88/4= 22 inches around which is about the size of my head). I wanted cables, so I made up a cable pattern that would repeat evenly into 88 stitches (11 stitches per repeat of my cable pattern).

I started knitting a 1x1 rib for about 1.5 inches, then switched over to my cable pattern. Once I got to the top I switched over to stockinette stitch for the decrease section.

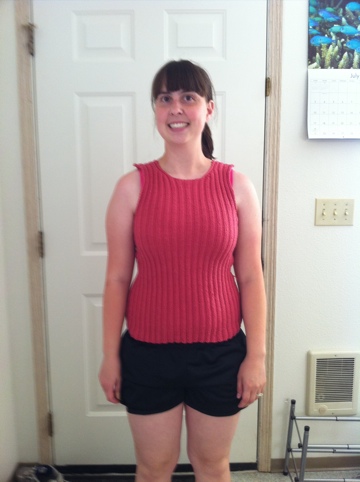
I finished the hat by Sunday afternoon and was super excited to have my own wool hat (I have made a few for other people, and have acrylic hats that I have made but until now I had never made myself a wool hat).


(Of all the pictures in this post, the one on the right here shows the true color the best. I was lazy and took all of these pictures from my phone this week which is why the quality is not so great.)

After the hat was done, I looked at my yarn and decided that I would probably have enough for a matching pair of mittens. So, on Sunday night I started on mitten #1.

I used the same size needles and cast on 28 stitches. Did the 1x1 rib again then knit up to the bottom of the thumb. Increased a few stitches for the thumb gusset, then kept knitting to the point of the hand where the thumb branches off. Here, I put my thumb stitches on a holder and just knit up to the top of my fingers. Then decreased and gathered the stitches together. After going back, picking up and knitting the thumb stitches and gathering them together, I was done.

Since it is a holiday today, I cast on mitten #2 this morning. Now, I have my own set of Corridale wool mittens with a matching hat.

This is the great thing about bulky yarn- it knits up fast!

Merry Christmas Part 2

So, you already saw what the Moms got for Christmas. Well, the guys got some hand-knits too. My dad got a hat and socks made from hand-spun alpaca/silk. When I got the fiber it looked like this:

The white parts are the silk and the black is the alpaca. Once it was spun it looked like this:

I used a general top-down boot sock pattern for the socks.


It worked out well that my husband and dad have almost the same size feet, so my husband was constantly trying on the socks to make sure they were the right size. (Thanks!)

For the hat I used the same yarn, started out with a knit 2, purl 2 rib and then switched to stockinette stitch for the rest of the hat. Again, my husband got to keep trying on the hat.

Since alpaca is even warmer than wool, these are super warm.

For my father-in-law there was a pair of socks in Green Bay Packers colors. I am not so great at dying yarns that actually turn out the colors I want them to so for this yarn I turned to Etsy.com. I found a shop called GalianaCreations that had some Green Bay colored sock yarn. She didn't have as much as I needed, but was willing to dye some more for me. The colors turned out amazing, and the yarn was so soft!

I used a general sock pattern with a short row toe:


Since my husband is also a Green Bay Fan, he got a pair too. Basically the identical pattern with minor changes such as a wider foot.

It turned out that there was just enough yarn left over to make one more small pair of socks, so I got my own pair. These were a toe-up, short row heel sock.

Now, we will all have toasty feet for Packer Games. :)

Merry Christmas! Part 1

Now that Christmas is over, I can finally show all the projects that I was working on but couldn't post because they were presents. I'll start with the moms. My mom got a lace scarf and a matching headband. The yarn was hand spun. 80% merino wool and 20% silk. The colorway is called Black Current but it is a deep purple color. The scarf pattern is a free pattern from ravelry found here: Grapevine Lace Scarf. The headband is just plain garter stitch knit into a rectangle then sewn together.

Here it is before blocking:

while blocking:

After blocking:

My mother-in-law received a lace scarf as well. This yarn is also merino but my favorite part about it is that it has bits of silver in it that make the scarf sparkle. This pattern was also from ravelry and can be found here: Lacey Keyhole Scarf. One side of the scarf has a hole so that the other side can be pulled through.

Unfortunately I forgot to take pre-blocking pictures, but here is the scarf:

Hope you enjoy your new scarfs!

As for me, I got lots of awesome knitting related presents. Including books, bison yarn, blocking supplies and dyeing supplies. My awesomel husband even got me a drum carder that I cannot wait to try out. (Thanks everyone!) Keep an eye out for part 2 of this post where I will show what the guys got... :)

Christmas and a Birthday

It's been a while since I posted, but in that time my husband had a birthday. Not long after I started spinning, I got some merino roving that was super soft. After it was spun, Jason commented how it would make a nice hat. From then on, that's what it was destined to be. While looking for a hat pattern on ravelry to make for him, I found one that I thought just screamed "Jason". It is called "Hubby's Decoder Hat." The idea of this hat is that is has a secret message in binary. The knit stitches represent "1" and purl stitches represent "0." So, you decide on a message, figure out your sequence of 1s and 0s then cast on. Once the first row is knit, you just knit the knit stitches and purl the purl stitches all the way around. Unfortunately, I couldn't try it on his head since it was a surprise and it turns out he has a longer head than I thought. When he tried it on and folded up the brim it didn't quite cover his ears. So, I ended up ripping out the decrease section on top, adding some rows and closing it back up. In the end it looks like this:

I even made an extra challenge for him when I sewed in the end and forgot where the binary pattern started. Oops! In the end he figured out that the message spells out "I Love Jason." Happy Birthday!

Tree Skirt

Another project I have been working on is a Christmas tree skirt also known as the never-ending Christmas tree skirt. The pattern I found is here: Tree Skirt. I got some Red Heart Shimmer yarn and grabbed the crochet hook listed in the pattern. This was my first mistake. With both knitting and crocheting I have a tight tension and always need to go up at least 2 needle/hook sizes than what the pattern lists. But did I think of this at the time? No.

I crocheted and crocheted and all of a sudden I was almost done with the pattern but the skirt seemed really small. I had one row to go and the skirt was only something like 12.5 inches wide. I look back at the pattern and it says the finished length is 18.5 inches. Ok, fine. It went pretty fast so I ripped it out and started again with a K hook (2 sizes bigger) thinking that this would fix the problem. I get to the last row again and it's 14 inches. Ok, it's a pretty straight forward repeat, so I'll continue the pattern with one more repeat. Finally it was 18 inches wide.

It's kind of funny that it's called the 7-hour tree skirt and this turned out to take much more than that.

In the end though, I think it was worth it.

This one is for Jason. Go Pack Go!

Haruni

I'm so excited I finally have something finished to show you! I think that this is my favorite knit projects so far, and also the biggest lace project I have completed. It all started with some roving that I showed you earlier.

Then, the roving was spun up into yarn on my handy spinning wheel.

All along I knew that I had the perfect plan for this yarn. It was to become a Haruni Shawl. This is a pattern that I found on Ravelry.com and have been dying to make. Once the yarn was done, washed and dried, the knitting needles came out. Here it is soon after I started:

A little later...

And finally, off the needles:

This is where you have to keep in mind that lace needs to be blocked. So, I took the shawl, soaked it in some cool water and pinned it out to dry on some foam mats. It always amazes me how much blocking really makes a difference. It opens up all of the lace and really makes it pop. Check it out:

Once it was completely dry, I un-pinned it from the foam.

Here you can see the difference. The picture on top is before blocking and the one below is after blocking:

(The real color is darker blue than the top picture but not as dark as the bottom. Lighting wasn't cooperating very well...)

I really don't wear shawls, but this one was so much fun to make that I might have to start wearing them. I am seeing more in my knitting future. :)


Yarn Fest '11

Last weekend was Yarn Fest '11 AKA a trip to Portland with my husband and his parents. Did you know that there are more than 15 yarn shops in Portland? This doesn't even count the ones in the cities around Portland. So, once I found out that there are so many yarn stores in Portland I began doing my research. I visited their websites and made a list of shops that I wouldn't mind visiting if we had the time. The one thing that I wanted to get from one of these shops was a pair of sock blockers. These really don't have too much of a purpose (for me, anyway) except that I would like to start making more socks and I think that the pictures of socks just look better when the socks are on the blockers. Of course I ended up with much more than just sock blockers.

These are my 2 new pairs of sock blockers (large and small). Also shown here is a magnetic notebook from KnitPicks which is awesome for keeping track of where you are while reading knitting charts. But there is more.

The yarn! On the left is yarn that Mary and I just couldn't pass up. (She got some, too.) In the store it was knit up into a spiral scarf. I don't know how else to describe what this scarf looked like. I will just have to show you someday when I finish it (but don't hold your breath I have lots of projects going on...). Up at the very top is some hand-dyed blue faced Leicester (a kind of sheep) roving. While I have quite a supply of spinning roving, I just couldn't pass this up. It is so pretty! Below that, there is some pink yarn. This yarn is in the collection because it is superwash merino that was 40% off. I just couldn't not buy it. Below the pink is some green lace weight yarn and below that is some purple lace weight. I have decided that I love knitting lace! Yet I have never actually knit with lace weight yarn, so this yarn was a must. :)

While all of this is great, the best part is still to come. When visiting Portland, a visit to Powell's Books is a must. This is the best bookstore ever. It is HUGE. We had been exploring for quite a while when Jason and I decided to venture up to the top floor. Halfway up the stairs there is a sign announcing author events. I skim through the list and notice a familiar name. Stephanie Pearl-McPhee. I say to Jason "I know who she is, that's cool that she will be here. Wait, is today the 28th?" Yep, it was. She was there the day we were. If you don't know who she is, she is a knitting writer and blogger, and she is hilarious. She is also known as the Yarn Harlot. I read her blog (www.yarnharlot.ca) on and off and she is a fantastic knitter and writer.

My husband and in-laws were kind enough to stick around for 2 hours until she showed up and read from her new book All Wound Up. Mary even sat with me and listened while the boys went to more interesting places. This lady cracked me up! And Mary even seemed to enjoy it. If you check out the Yarn Harlot blog post from Portland you may even be able to spot us. There are 4 audience pictures at the beginning of the post. Look at the bottom right corner. Mary is between the man with white hair and the lady with the light blue sweater. I am to the left of her (right next to the big white beam).

Overall, it was a great weekend. We had a fun time visiting with Jason's parents. The Yarn Fest part was really just a bonus. Anyway, I think Mary ended up with more yarn than I did!

Catching Up

Since I was sick last weekend and didn't leave the couch, it has been a while since I have made a post here. I have been knitting up a storm but unfortunately most of the things I have been making cannot be shown here. This is because they are Christmas presents and I don't want to ruin any suprises!

I did finish up the green and gold baby sets I have been working on. You have already seen the hats, but here they are with the booties and blankets:


I have also been spinning some very interesting yarn. It came with my fiber of the month club box. It is the brightest pink roving I have ever seen. I am spinning the single strand right now, then will turn it into 3-ply yarn. I have no idea what I want to make out of it, but whatever it is, it sure will stand out!


Charity Squares

Recently I had decided that I needed to start using up some of my yarn stash. I was thinking about making hats or scarves for charity, but something else just happened to fall into my lap. Last week I saw that my local yarn shop was collecting squares for KasCare. Basically, this charity collects 8 inch by 8 inch squares. Then they sew them together and give them to AIDS orphans. The yarn shop has put a twist on this idea and is doing a competition between the two local schools. They want the squares to be in either WSU colors (crimson and grey) or UI colors (silver, gold and black). Since I graduated from UI, but work at WSU and have yarn in the colors of both schools in my stash, I decided to make some squares for each school. WSU:

UI: 

The shop is collecting squares up until October 15, so I plan on making as many as I can with the yarn leftovers that I have. This charity is always looking for squares and their goal for 2011 is 170,000 squares. So, if anyone else out there has extra yarn, you can always consider making some squares and sending them in!

Hats Galore

This weekend I have been working on lots of hats! I had a few requests from people and needed to get going on them. The first one is a much smaller version of a hat that I have made many times for lots of people. I didn't exactly know how I was going to modify the pattern to make it go from adult size to baby, but it turned out to have a simple solution. All I had to do was use a much smaller crochet hook and I didn't have to change the number of stitches at all. Here is the finished product on my little model:


And here are a few that show the pattern a little better:


I have also been waiting for some yarn to come in the mail to start on some sets for a pair of twin boys. Luckily, the box came yesterday so I could get started.

Eventually there will be hats, booties and blankets. They will all be in green and yellow, but the main color of each set will be different. Here's what I have so far:


I will post the matching booties and blankets as soon as they are done!

Crochet German Shepherd

Last Christmas I had an idea to start making the dogs and other animals from Planet June (my favorite crochet designer). I wanted to make them in a smaller size then loop a ribbon through the back and make it into a Christmas tree ornament. I thought of the idea too late though and only got a few made in time. I did end up selling a dachshund:

So, I had decided that I would make a bunch throughout the year and have a collection of them to put on my website this Christmas. So, how many do I have done? As of today I have 1! He is a German Shepherd. Although he already has a future home this Christmas I hope to make some more to actually put up on Etsy.

These patterns are super easy to make. It is all in single crochet and works up pretty fast. I started this guy last night and finished him up when I got home from work today. Here is the collection of parts: Head, nose, 2 ears, body, front legs, back legs and tail.

For me, the worst part is sewing all of these together. I started with the head. First it was stuffed, then the nose was stuffed and sewn on, followed by the ears being sewn on. Once these were attached the eyes were added.

Then came the rest of the body. And once everything was attached, a German Shepherd was born:

Hope you enjoy him. I have a lot of projects to get done, but hopefully I will have more puppies for you soon!

Felting - A Lesson Learned

I have always been amazed by anything felted. I remember the first time I saw something that was felted. My 4th grade teacher, who taught me how to knit, made many felted hats and brought them to class with her. I remember thinking that it was so cool that you could knit something really big, and wash it in hot water to shrink it. While I love to admire the felted projects of others, I was always too scared to try it. The reason being that once something is felted, it cannot be undone. Felting can only occur when animal fibers are used (wool, alpaca...). These fibers are lined with scales that, when felted, interlock with each other and form a solid fabric. In order for a fiber to felt, you need 3 things: water, heat and agitation. (Which are the three things you have to avoid if you are not trying to felt!)  Once something is completely felted you can no longer see individual knit stitches. You also can not unravel it and try again like you can with almost any other yarn project.

So, this story starts with a Nook. Last Christmas I got a nook and I decided that I wanted to knit a little Nook cozy for it. I really like the way this cozy turned out. (It is even the banner of my Etsy Shop).

Once this cozy was done I had a lot of extra yarn that just happened to be 100% wool. Since I already got the cozy out of it, I decided that I would use the rest for my first felting project - a bag. My first mistake here was that I didn't make a swatch, felt it, and see how much it shrinks. My second mistake was that I didn't know that knitting shrinks more lengthwise than it does width-wise. My third mistake was that I didn't look at any patterns, but made up my own instead. (It worked with the nook case...) Unfortunately I don't have a before picture of this felted bag, but trust me - it was not this shape before it was felted. It was much more square, and I thought it might even make a nice bag. So, I through it in the washing machine and,

well, my husband has named it the "felted underwear with no leg holes." Anyway, that disaster happened back in February or March and I haven't felted anything since then. Until yesterday that is.

Last week I got one of the new Nooks with a touch screen and decided that it needed a cozy of its own. I had a bunch of wool scraps lying around and thought I would make a striped felted Nook case. This time I did a little more research and made the case longer than I thought it should be. (I added an extra 25% width and extra 30% height.)

Once it was done, I put it in the washing machine, then let it dry overnight. When I got home from work today I went to check on it. Except for the way that the top flares out, when they are side by side it looks alright.

Then, once the Nook is inside, it doesn't quite fit.

The top of the Nook sticks out - it shrunk too much. Again. Oh well, I think I'll stick with non-felted Nook cozies. But now I have a felted bag and don't know what to do with it. Any ideas?

Swift

This week I got a new yarn toy. We needed to go to Spokane again this weekend which meant another trip to Paradise Fibers. I have had my eye on a yarn swift, but didn't know how much I really wanted one until I tried to roll a ball of yarn from a hank. Just when I was over halfway through, I ended up with a huge knot and it took forever to roll it. For those of you who don't know what the heck I'm talking about, a hank of yarn is basically a huge loop of yarn that is twisted upon itself. For example, these are hanks:

Sometimes yarn is sold in this form, but it is also the way the yarn ends up after I spin it. It needs to be in this form for dyeing as well. Once you are ready to use the yarn it must be rolled into a ball, otherwise it will tangle, and will turn into a huge mess! A swift is a tool that holds the loop of yarn while you roll it and prevents the yarn from tangling. The one that I got is the Paradise Fibers Super Swift II.

I have mentioned the Masham yarn that I dyed maroon in a few previous posts. It got to be the first hank on the swift.

Once I found the start of the yarn, I hooked it up to my ball winder and started winding. As the ball winder spins, it turns the swift and the yarn smoothly moves from a hank into a ball.

And voila! It is ready to be knit!

Cherry Berry Baby

This post is a little late since I have been trying to post on Sundays, but our internet was out all day yesterday. Therefore, this week gets to have a Monday post! I was recently asked by my mother-in-law (who is a great supporter of my shop - thanks Mary!) to make some baby outfits. I thought that I would find some patterns to knit (versus crochet, which is how I have been making all my baby sets). I found some patterns that I thought looked really cute together. They are all sized for a 6-12 month old, and made with acrylic yarn. While I have been learning about and using a variety of fibers, I like to stick with acrylics for baby patterns. The reason for this is simple - it is machine washable. I figure, babies are messy and their moms are probably not going to want to hand-wash their clothes. Here is the end product:

I started with the hat which was a really simple pattern on double-pointed needles. The yarn was Bernat Baby Jacquards in the Cherry Berry colorway. The yarn made a self-striping pattern that turned out really nice looking.

For the dress I used TLC Baby yarn in the Powder Pink colorway and a pattern called Baby Sweater Dress found on the Lion Brand Yarn website. For the bottom garter stitch rows and the two rows in the middle I used the same yarn that was used for the hat.

The booties are made out of the same yarn as the dress and are called Mary Jane Booties. I decided to omit the buttons on the sides to reduce the chance of the little one pulling them off and attempting to eat them.

I also started working on a matching blanket. It is a dark pink and I am using Lion Brand Pound of Love yarn in the bubblegum colorway. The plan was to knit a blanket but after many attempts at many patterns and much ripping out of yarn, I made the decision that it will be crocheted. All the knitting patterns were fairly difficult lace patterns. I would get to the end of a row and not have the right number of stitches on the needle. Then I would have no idea where I lost/added a stitch. Maybe someday I will attempt another lace knit blanket, but for now I'm sticking with the much more forgiving crochet pattern.

This pattern is very similar to the very first crochet pattern that my mom ever taught me, but with a different edging. I haven't made it very far yet, but here is a sneak peek:

Yarn Paradise

This week I don't have any completed knit or crochet project to show you (but don't worry - there will be some in the near future), but I do have more yarn. On Friday I made a trip up to Spokane and of course had to stop at Paradise Fibers! I got to try out their new spinning wheel that isn't even for sale yet. It looks like it will be a pretty awesome wheel when it is ready to go. Of course it just wouldn't have been right to leave the store without buying something, so I got a new addition to my fiber collection: 

I love these colors and it's superwash which means that whatever I make out of it can go in the washer and dryer without felting.

When my husband went to Alaska last month he picked up some hand-dyed roving for me to spin. (What a great husband!) It was beautiful shades of blue, green and purple. I got it spun, but am still not sure what to make out of it. Here are before and after pictures for you:


The pictures don't do the colors justice, but this is probably my favorite yarn that I have made because I love the colors so much. It is 100% merino and very soft.

Last but not least, remember this roving?

It is the Masham wool that I got as part of my Fiber of the Month Club.  This was a really easy and fun fiber to spin. As usual I spun it into singles first:

Then used the Navajo plying method that I discussed in a previous post. This made a nice sturdy 3-ply yarn:

I love how this yarn turned out. It has now been washed and is drying outside. I have exciting plans for this yarn, so this will not be the last you will see of it.

Amazing Lace

Welcome back! I have some new stuff to show you this week. First of all, I'm sure you have already noticed the new theme. I decided I liked the colors and layout better. Secondly, I now have my own domain (thanks, Jason!). You can access my blog the way you have been, or also by going to crystal-crafts.net and my shop can be found at shop.crystal-crafts.net. Now on to the fun stuff. I always love learning new knit and crochet techniques and lately it has been all about the lace. It has always looked so complicated to me that I have been afraid to try, but I gave it a shot. I just finished my first lace scarf and it was easier that I thought it would be. Now I want to try more lace projects!

I started off trying to make the One Row Lace Scarf (http://turvid.blogspot.com/2009/03/free-pattern-one-row-lace-scarf.html):

While I really love this pattern, I decided that I wanted to go in another direction. I was using my hand-spun cashmere yarn after all and wanted something a little nicer looking. So, back to the ravelry pattern finder I went and came up with the Leafy Lace Scarf pattern (http://knitlet.typepad.com/knitlet/files/leaflacescarf.pdf).

The interesting thin about this pattern is that you knit each half of the scarf separately, then use the kitchner stitch to sew them together. The kitchner stitch uses a regular yarn needle to sew stitches together in a way that looks like it is knit. To do this, I first had to line up both halves of the scarf. At this point all the stitches are still on the knitting needles:

Then I got out the yarn needle and started sewing the two halves together:

Once it's done it's hard to even tell where the seam is:

One of the most important steps in the lace knitting process is blocking. Blocking involves soaking the scarf in cold water then pining it out so that the lace pattern can open up. It stays pinned until it is completely dry. I got 2 towels out on the ground and covered then with a black sheet (for pictures). Then I started pinning...


I left it out for a few days to make sure it was completely dry, then took all the pins back out. Below you can see the before and after pictures from blocking.


And it's done! As you can see, blocking really does make an amazing difference!

Spin, Spin, Spinning

Well, my week sans husband is almost over. I still have tons of knitting and crochet projects that I didn't get to this week, but I did get lots of spinning done.

From left to right: baby camel, alpaca/silk mix, and the last three are corriedale.

The baby camel is so soft! I tried to spin it pretty thin so that I could make something lacy out of it. This yarn is darker brown than it looks in the  picture on the right, and I think it would make a pretty shawl or stole for the fall. One thing I discovered with yarn is what a distinct smell wet camel fiber has. Good thing it was so hot outside I just hung it up and didn't have to smell it for long!

The three yarns shown above all use a new plying method I just learned called Navajo plying. This is a way of making 3 ply yarn from one strand. If you want to see a video of this technique in action check out this YouTube video: http://www.youtube.com/watch?v=JmlwtojLXI8 (you might want to fast forward to about a minute into the video). You might recognize the colors of the first 2 yarns shown above. These were the 2 colors that I plied together to make the yarn that I showed you last post (or far right on the first pic of this post). I still had a bobbin of each color left and decided to use the Navajo method to ply them individually. The orange/pink yarn turned into a really pretty variegated yarn. The third picture above it a 50/50 alpaca and silk mix that I got from the Paradise Fibers fiber of the month club. I also used the Navajo ply method, but made this a much thicker yarn. I think this may end up turning into a nice, thick pair of mittens.

While that's all for the finished yarns, I have some roving that is being dyed as I type this post. It is also one of the fibers that I got as part of the fiber club. It is Masham wool, and I decided to dye it a deep red/purple color. I have 6 ounces of roving, and I used 6 packets of black cherry Kool-Aid and 2 packets of grape. Here is the before picture:

And the after...

As soon as it dries it will be spinning time again!

Did someone say yarn?

This weekend was all about cataloging and organizing my yarn stash. I'm not sure how it keeps growing, but it does. Ok, I know exactly how it keeps growing but I just can't seem to stop accumulating more of it! I have been meaning to go through the yarn for a while and enter it into my ravelry.com stash to keep better track of it. This weekend was the perfect weekend for this event because while my husband is out-of-town for the week I have turned the living room into the yarn room. I'm starting to like it this way. I think it should stay this way permanently, unfortunately my husband probably has other thoughts... Here's the entire collection pre-sorting. A yarn mountain!

It has now been entered online so I can keep track of what I have. It is still sitting in the living room, but somewhat more organized so I have space to work:

As you can see, the wheel is positioned to see the TV, all my knitting needles are accessible, my knitting project (which I will tell you about in another post) is out, and the computer sits in the middle so I can type this post.

After seeing how much yarn I have I decided that I need to start making some projects to eat through the stash. So, I decided to do a scarf. It is a simple scarf knit the long way in straight garter stitch. I used size 11 needles, cast on 200 stitches and went to town with all kinds of scrap yarn. Here is the end result that I finished this morning:

I'm still not sure if I really like how it looks, but it successfully used up some odds and ends that I had hanging around.

When I wasn't working on the scarf, the spinning wheel has been running. I have been working on the red/pink/orange roving that I showed you in the last post. I spun the red on one bobbin, then alternated the pink and orange on a second bobbin.


Then, I took one strand from each bobbin...

...and plied them together.


I didn't know what to expect from this, but it turned out interesting. If I were to try this again, I would probably use one of the lighter colors as the main color since the red is kind of overwhelming. I can't wait to see it knit up into something! :)

Adventures with Kool Aid

Welcome back! First of all, the tank top that I mentioned in my first blog  finally dried and my head still fits through the head hole! It's pretty heavy and won't be as cool as I would like, but I'm glad I went ahead and finished it. 20110725-064427.jpg

Now to the main subject of the blog- Kool-Aid dying! I learned about this when I was at the fiber studio in Uniontown and had to try it out for my self. Kool-Aid dying works with any animal fiber (not with cotton or other non-animal fibers). It is so easy and fun. You just take a pot of water, get it boiling, add Kool-Aid (without sugar!) then add the yarn/roving.

20110725-064152.jpg

The yarn (or roving in this case, which will be spun into yarn) absorbs the Kool Aid and the water becomes completely clear. With this batch I used cherry flavored Kool Aid for half the roving and lemonaid for the other half. I spun each color separately and plied them together.

20110725-064232.jpg

Then, with different yarn I decided to attempt to make a teal color by mixing blue and green. Turned out more green than blue but it was an interesting experiment!

20110725-071459.jpg

For my next batch of roving I decided that I wanted to experiment with more colors, so I took 8oz of Corridale roving and divided it into 4 chunks. I dyed each piece a different color. I had purple, blue, yellow and green. I then took random  pieces of each color and spun them. Then, by plying them together I ended up with an interesting blend of colors.

20110725-071420.jpg

20110725-071431.jpg

What's next? Well, I decided to go for the reds this time. Turns out that cherry and strawberry make the same shade of red. So I took another 8oz of Corridale roving and split it into 4 pieces. Along with the cherry and strawberry there is also pink lemonaide and orange. The goal here is going to be to spin the red together in one single ply strand, then alternate pink and orange in the other strand.

20110725-071647.jpg

Once those are done I will ply them together and see how it turns out!

Hello World!

Welcome to post #1 of the CrystalCrafts blog. This is a place where I can keep track of what I'm working on while sharing them with you at the same time. In fact, over the last few days I finished some projects that I want to show off. The first one is a knit tank top. The pattern comes from Lion Brand and it is called the All Season Shell (60433). I used 100% cotton yarn (Loops and Threads Brand Cotton Club in Wild Rose) in the hopes that it would be nice and cool for the summer. Turns out the yarn is thicker than I intended and it may not be as cool as I wanted, but we'll just have to see what happens. At the moment it has been washed and it drying in my craft room. I am very glad it turned out since the first attempt was kind of a failure. I finished it, went to try it on, and my head didn't fit through the head hole. Oh no! Anyway, I Un-did the shoulder seam, picked up the stitches, added a few rows and used kitchner stitch to seam it back together (which looks a lot smoother than when I had sewn it).  I tried it on again and voila! my head fits through the head hole. Yipee! I don't have a picture of me wearing it yet, but here it is drying:

The next project that I recently finished was a diamond pattern crochet hat. This hat is kind of special because it is the first item I made from fiber that I completely processed myself. A friend of mine gave me wool from her sheep. First step: skirting. I took the wool out of the bag, got rid of the dirtiest parts and saved the rest.

For this step I decided to take the wool out to the porch. I bought some cotton zip-up pillow cases to put the wool in for the next step: washing.

Then it was bath tub time. I turned up the water as hot as possible, filled up the tub, and the wool went swimming. The tricky part here is making sure that the wool is not agitated because heat+water+agitation=felting which means a huge blob of wool that cannot be spun. 

After combing out the wool with some dog undercoat rakes (which I will never have to do again since i got some awesome home made wool combs- thanks Dad!) I spun it on my amazing Kromski Sonata. I ended up with quite a bit of yarn. (576 yards if you want to know exactly how much.)

I took 1 hank, dyed it with blue raspberry kool aid and crocheted it into a hat:

Voila!

Now I'm off to go work on a new project. Not sure what it will be yet, but I'll let you know when I figure it out!